Calf Jacket How-To Guide

While calf jacket use varies depending on your location, climate, and management practices, the following information will provide you with valuable tips on:

  • How and why to use calf jackets
  • How to care for calf jackets
  • How to choose the best calf jackets

Why use a calf jacket?

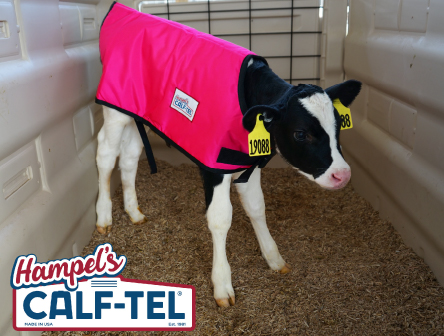
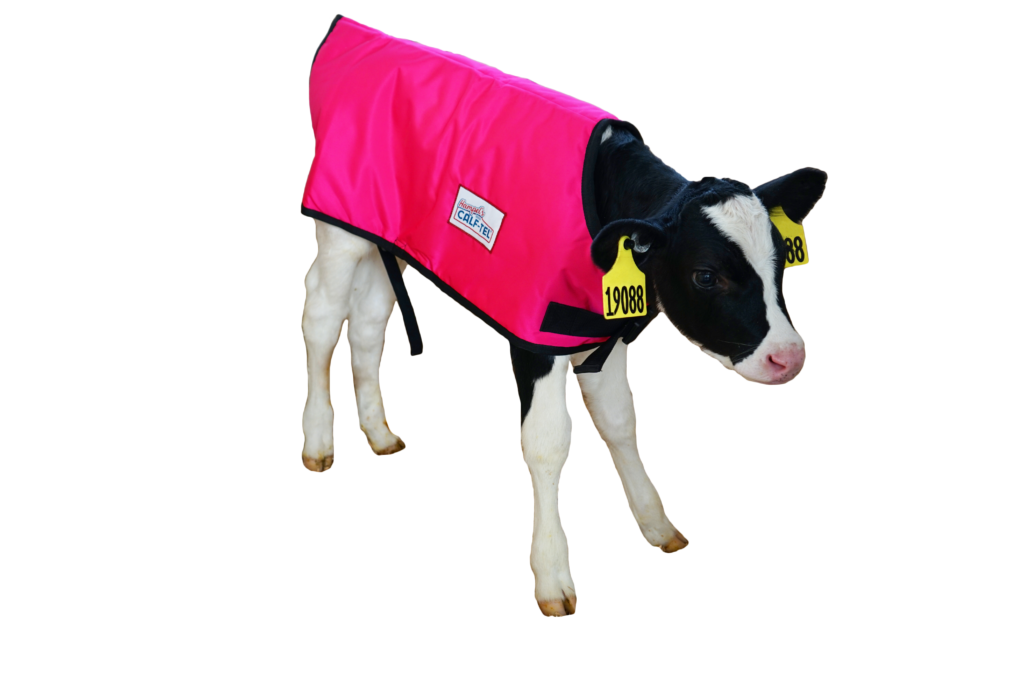
Calf jackets, also referred to calf coats, are a cost-effective tool that helps prevent cold stress in calves. Calves have a temperature range where they are considered to be comfortable, known as the “thermoneutral zone”. For a newborn Holstein calf, this zone is between 50 and 78°F (10 to 25°C). If a calf’s temperature goes above or below these temperatures, the calf will divert its energy from growth and immune function towards maintaining its core body temperature.

How to properly use a calf jacket

  • A jacket can be used when outside temperatures dip to 50 degrees F (10°C). Cold stress begins when temperatures drop below 60°F for calves less than 21 days of age and when temperatures drop below 50°F for calves greater than 42 days of age.
  • Jackets are highly recommended on newborn calves up to three weeks of age and for calves suffering from illnesses as a way of ensuring they aren’t using all available energy just to stay warm.
  • First, make sure the calf has dry, clean, deep bedding it can nest down into. In the first few weeks, newborn calves spend most of their time lying down. A good way to know if the bedding is dry enough is to kneel in the bedding for a few minutes. If your knees are damp or wet, then the bed is not dry enough to eliminate additional cold stress. This can lead calves to spend more time standing, exposing more body surface to heat loss.
  • The calf’s natural hair coat should be clean and dry before putting on a jacket. Newborn calves should have time to dry before being moved to an outdoor hutch or indoor pen. As the temperature drops, any moisture trapped under the jacket will cause the calf’s body temperature to lower further.
  • Ensure calves are not sweating while wearing calf jackets during the day. Again, as temperatures drop the moisture will cause a decrease in the calf’s temperature.
  • The jacket should be snug, not tight. We recommend just loose enough to slide your hand under the jacket. Be certain to adjust the straps at the front chest and rear legs every week to accommodate the growing calf and avoid the natural hair coat from rubbing off.

How to maintain and care for a calf jacket?

  • Jackets should be regularly machine washed and dried to reduce the spread of bacteria. High quality calf jackets, like those from Calf-Tel, are well insulated.
    • Insulation works by trapping air molecules between the calf and the outside air. The more air the insulation is able to trap, the better the insulation will be. If the jacket is compacted with soiled material, then the insulation may not work effectively.
  • Calf jackets should be stored in a clean dry location ready for use.

How to choose the best calf jacket for you?

There are many types of jackets to choose from. Here are some of the key factors to consider when choosing the best calf jacket for you and your calves.

  • Straps & Fasteners:
    •  Straps should be long enough to allow for use on large and small calves as they grow.
    •  Most jackets use either Velcro or plastic buckle fasteners.  Velcro is cost effective but can become clogged and matted with debris.
    •  Plastic buckles ensure a secure fastening, adjustable strapping and are long lasting.
  • Material: Calf jackets are used in harsh conditions and should be durable enough to withstand normal day-to-day conditions and multiple washings. A water-repellant shell on the jacket also helps keep both the calf and jacket drier in outdoor settings.
  • Insulation: Insulation is what keeps the calf warm. Calf jackets should be properly insulated with material that is densely woven, preferably 200g or more, thick and durable.
  • There are typically two sizes of jackets, large (Holstein) or small (Jersey).

Helping Calves Thrive Through the Cold

By Grace Kline

During the fall season, some of you may be having chilly but calm weather. Soon enough, that’s going to change. The winter weather can be unpredictable, so this is the perfect time to review the protocols that help our calves thrive through the cold.

One term that is good to remain familiar with is the thermoneutral zone. The thermoneutral zone is the temperature range where a calf does not need to expel extra energy to maintain comfortable body heat. According to the Calf Care Corner run by Veal Farmers of Ontario, “From birth until four weeks of age, this range is between 10°C and 25°C (50 – 77°F), and from four weeks to weaning, it decreases to 0°C to 25°C (32 – 77°F)” (Veal Farmers of Ontario, 2019). Because we cannot control the outside temperature, we need to provide the calves with the environment and the tools necessary to continue to grow through the winter and turn into profitable cattle.

How do we do this?

Bedding

Keeping calves clean and dry is one of, if not the most crucial, aspect of calf raising. When setting up a hutch for a new calf, I first lay down a pile of shavings. This will absorb moisture, keeping wet groundwater away from the calf and holding moisture out of the straw. Sawdust and shavings will provide a good base for the straw bedding. During the winter, calves need to be bedded in deep straw. It should be deep enough for the calf to “nest” in, creating an extra layer of insulation for their body heat. Sam Leadley, a calf and heifer management specialist with Attica Veterinary Associates of NY, always recommended a nest that is 4”-6” deep (Leadley, 2019). It is essential to keep an eye on the weather and monitor the status of your bedding so that you can be prepared for any winter storms or freezing weather.

Jackets

Another tool that is useful for insulating calves is a calf jacket. These provide another valuable layer of insulation and require careful monitoring. Calf jackets are adjustable and should fit the calf well to prevent the jacket from coming off. Jackets should only be placed on dry calves with cold temperature living facilities. A jacket on a wet calf will not allow the calf to dry, adding to its cold stress. Also, a jacket placed on a calf living in a warm environment or under a heat lamp could overheat the calf, causing it to sweat.

Jackets will get dirty, no doubt about it. They will need to be changed to keep the calves clean, especially if they are in a group setting. Bacteria could stay in a dirty jacket, and we risk the calf becoming ill. They are machine washable for easy clean-up.

Energy Demands

As the weather gets colder, calves use more energy to keep warm. This can damper their ability to grow and maintain body heat if feed rates are not carefully managed. We can discuss a few different options, and you can decide what works for you.

Feeding more milk in the winter is one option that can be done in one of two ways. Adding a third feeding will give the calves an extra boost during the day, if you are not already doing so. Purposefully visiting your calves for this third time will allow you to monitor them closely and exchange any frozen water buckets for fresh, warm water that encourages drinking. You can also choose to increase the solids in the average amount of milk you choose to feed. If you feed a milk replacer, getting a winter-specific or even a higher fat milk replacer will increase the amount of energy the calf digests. There are other options for fat additives if you are feeding whole milk as well, such as a milk fortifier. It is best to consult your herd nutritionist or veterinarian about changes to the calves’ diet.

Calves can ingest energy from their starter grain as well. Even in the winter, keeping fresh and clean water in front of calves will help boost the amount of starter they can eat (Leadley, 2019.). Offering warmer water in the winter may be more appetizing to the calf, which will in turn encourage them to eat grain.

Ventilation

Calf-Tel strives to keep your calves comfortable all year round. Calf hutches have been preferred by farmers worldwide for the fresh air they offer, and Calf-Tel continues to make them better and more adaptable to each farmer’s specifications and preferences.

The new 24|74 hutch from Calf-Tel features an upper ridge vent, which slides back and forth along the top of the hutch to open and close. The rear bedding door comes in different styles, which can all be propped open for maximum air flow in the summer. An additional lower rear vent has been added to the back of the hutch, giving you 5 adjustable pieces to control air flow in each hutch.

So, what do you do for the winter?

While the nights are cold, but the days are warm, I have been leaving the rear bedding door propped up on a lower setting than I would during the summer here in the northeastern US. This still allows for fresh air flow, but does not expose the calf to the cool nights too much. This would be a good time to consider closing the lower rear vents as well. You may have to decide whether it is time to close 1 or 2, or all 3 based on your location and if you have dramatic temperature changes.

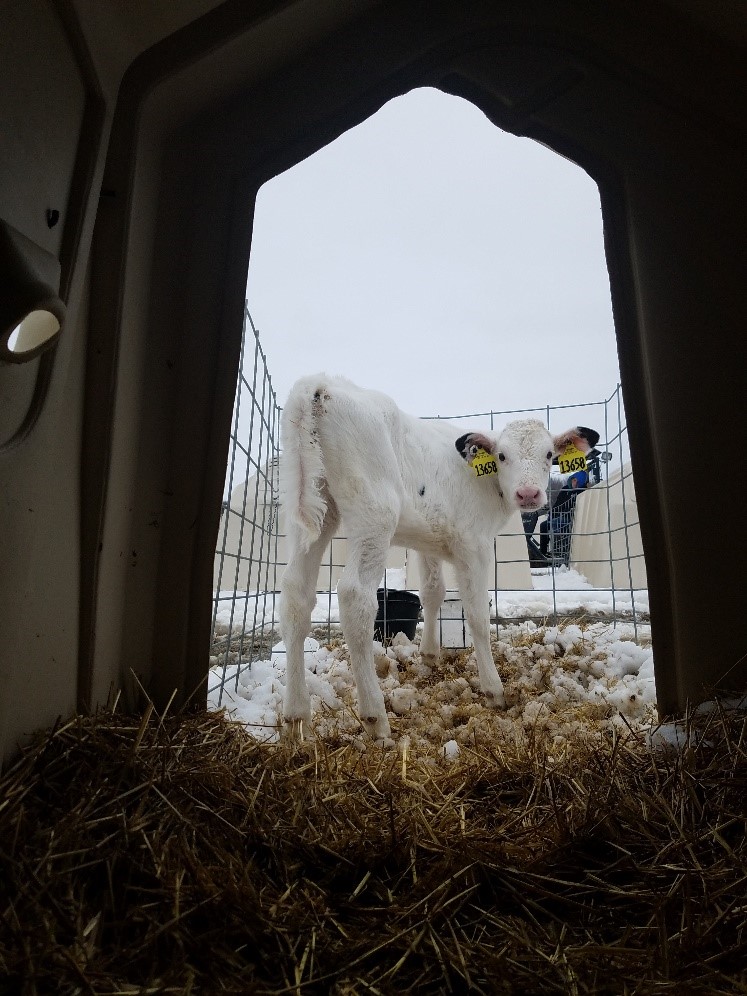
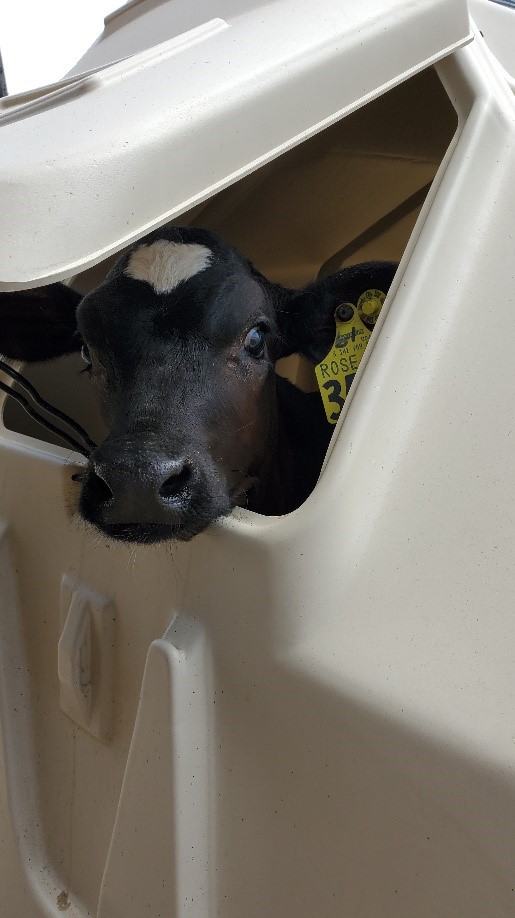
The front of the calf hutch allows for the most air exchange (Tyson, 2021). During the winter, you will notice that calves prefer to nestle into the back of the hutch, removing herself from the air that moves in the front. When the temperatures fall under the calf’s thermoneutral zone (50°F) on a regular basis, it is time to close the remainder of the vents. Monitoring the air in your hutches will reduce the risk of a draft, which can cause pneumonia.

Recap

Let’s recap. A few of the most important things to monitor during the cold are bedding, calf jackets, ventilation and energy demands. Keeping your calves clean, dry, and well bedded will allow them to maintain their body heat with less energy. Giving hutch calves jackets will give them an added layer of protection, while nestling into their deep straw bedding. Properly managing hutch ventilation will keep drafts off calves, reducing their risk of respiratory illness or pneumonia. Finally, keeping up with energy demands will help calves not only maintain, but grow, and thrive through the cold.

Grace Kline has raised dairy calves in the northeastern USA for many years. She is a graduate of SUNY Morrisville and farms with her husband at Diamond Valley Dairy LLC in Pennsylvania. Grace’s family enjoy growing and showing registered Holstein and Jersey cattle. Grace is also a valued member of the sales team at Farmer Boy Ag.

Citations and References:

Leadley, Sam. “Cold Weather Bedding.” Atticacows.com, ATTICA VETERINARY ASSOCIATES, P.C., 2019, http://www.atticacows.com/library/newsletters/ColdWeatherBeddingN19161.pdf.

Leadley, Sam. “Good Growth in Cold Weather.” Atticacows.com, ATTICA VETERINARY ASSOCIATES, P.C., 2019, http://www.atticacows.com/library/newsletters/GdGrowCldWea2R1923.pdf. Accessed Sept. 2022.

Tyson, John. “Winter Ventilation for Calves.” Penn State Extension, 27 Sept. 2021, https://extension.psu.edu/winter-ventilation-for-calves.

Veal Farmers of Ontario. “Adapting Calf Housing and Feeding to Winter’s Cold Temperatures.” CalfCare.ca, Veal Farmers of Ontario, 2 Aug. 2019, https://calfcare.ca/management/housing/cold-weather-housing/adapting-calf-housing-and-feeding-to-winters-cold-temperatures/.

Tool, Timing, and Techniques to Consider for Disbudding

Alycia Drwencke, Sarah Adcock, Cassandra Tucker

In the U.S., 94% of farms disbud their dairy calves. Despite how common it is, the number of decisions involved with disbudding are not often discussed. We have laid out several areas for considerations with this procedure, based on research we have conducted in recent years.

One of the first decisions is which tool to use for disbudding. Currently, the two most common methods use a hot iron or caustic paste. We have used both methods in our research and discuss the timing and some techniques that are used.

Hot iron disbudding

Tools: Several disbudding irons are available, and they use either butane or electricity for heat. Having an outlet near the calves makes the electric option a good choice, and butane power often makes more sense in outdoor housing or in barns where electricity is not nearby. Sometimes the size of the iron tips varies, for example, ¼ or ½ inch. We use the ¼ inch tip with young calves, 2 weeks or less, and the ½ inch tip when we disbud calves between 3 to 8 weeks of age. We adjust the tip size with age to create the smallest wound possible while making a uniform copper ring around the base of the bud.

Timing:  Disbudding before 8 weeks of age reduces the need for more invasive procedures. The best time to use an iron in the first 8 weeks is still unclear. Disbudding at a younger age may lead to more sensitivity to other procedures later in life (Adcock and Tucker, 2020). Near 8 weeks there may be a greater risk for scurs as the horn buds are bigger and disbudding is more likely to overlap with other stressful events such as weaning. We typically disbud before 6 weeks to minimize the overlap with weaning and large horn buds.

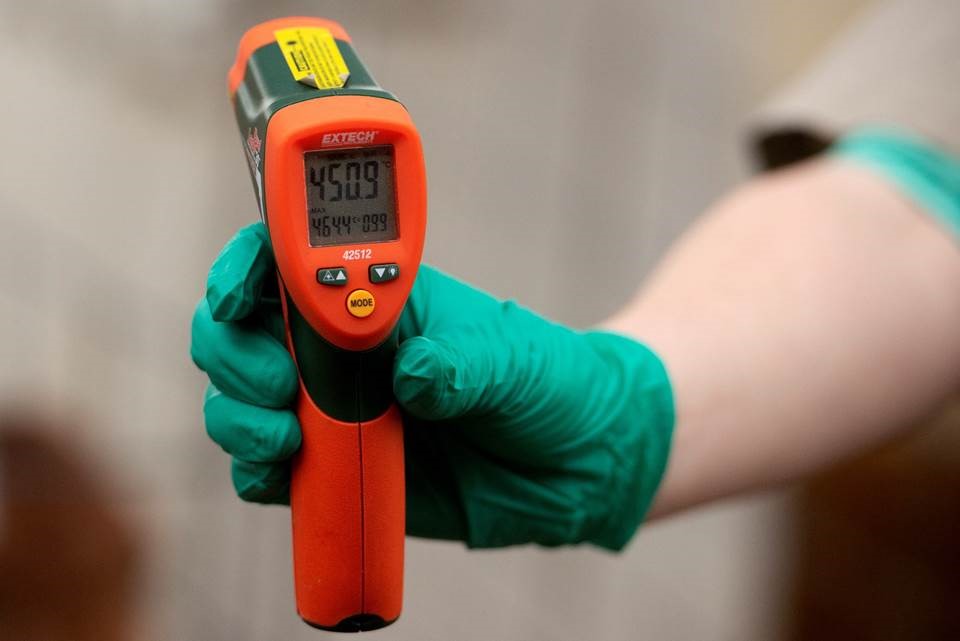
Techniques: Beyond the decision to use a butane or electric iron, considerations for hot iron disbudding include shaving the hair or not, the temperature of the iron, the amount of time the iron will be applied, motion of the iron and whether the horn bud will be left in or scooped out to remove it. When disbudding, we have the best success when our iron is heated to between 750 to 900°F. The iron can cool down as we disbud calf after calf and so we re-check the temperature with an infrared gun when doing multiple disbuddings (Figure 1).We apply the hot iron to a shaved horn bud with a small amount of pressure while gently rocking around the base of the horn bud for 10 to 20 seconds until a uniform cooper ring is formed and leave the bud in. For some irons, like the butane Portosol it is also important to consider the depth in which the iron will be applied, as these irons can easily “cut” into the calf’s head, creating a deeper wound. To minimize the wound size and damage, we only burn the horn growing tissue around the bud, highlighting the importance of watching the depth of the iron and avoiding burning into the white fat tissue.

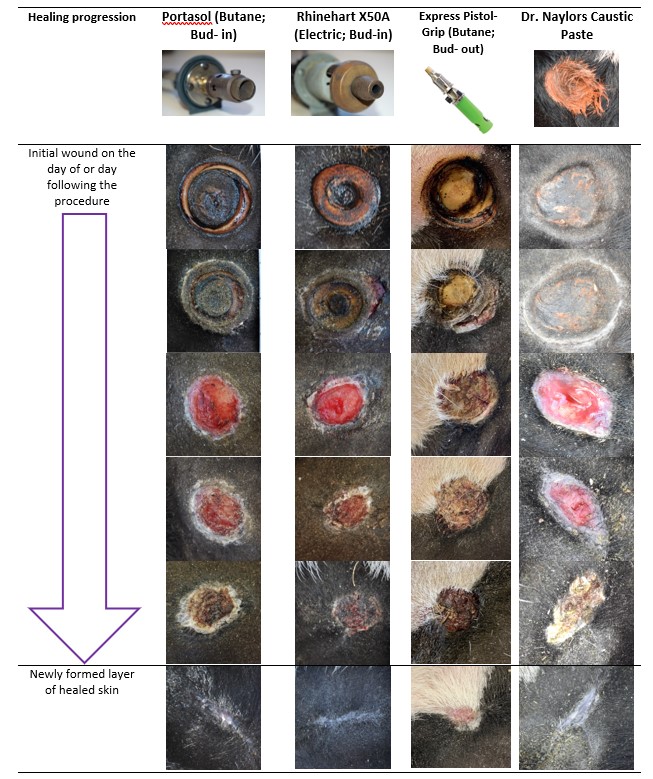
Outcomes from our research:  In a study comparing an electric and butane hot iron, wounds for both types of iron went through similar stages and were healed in ~8 weeks (Figure 2; Adcock et al., 2019). Throughout this healing time, calves disbudded with a hot iron show increased sensitivity to touch compared to intact horn buds for at least 3 weeks and fully healed tissue (Adcock and Tucker, 2018). In a recent study, our collaborators Reedman et al. (2022), used the bud-out approach and found that approximately 50% of calves had healed wounds at 7 weeks, suggesting a similar healing timeline to the bud in method. There is currently no published data looking at how leaving the bud in or taking it out may affect the calves.

Caustic Paste Disbudding

Tools: Currently there are several types of paste available including Dr. Naylor’s, Remoov, Hornex, etc. No detailed comparisons have been made between these brands. In our work we have primarily used Dr. Naylor’s but also used Hornex, a paste common in New Zealand, in a pilot study.

Timing: Typically, paste is applied within the first week of life because this is when the horn bud is small enough to be destroyed by a small amount of paste. Calves that are only a few days old also move less than older ones. This may favor earlier application because, one challenge with paste is how easily it can rub off from the horn bud onto other parts of the calf, housing, and pen mates. An unwanted burn will result on any body part it contacts. If paste is found in an undesired area, we used vinegar to neutralize the paste and stop it from creating any further burns.

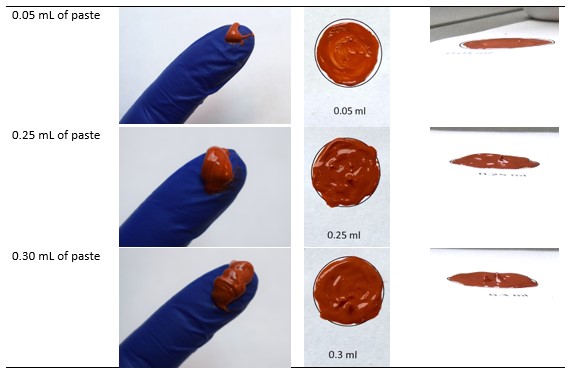
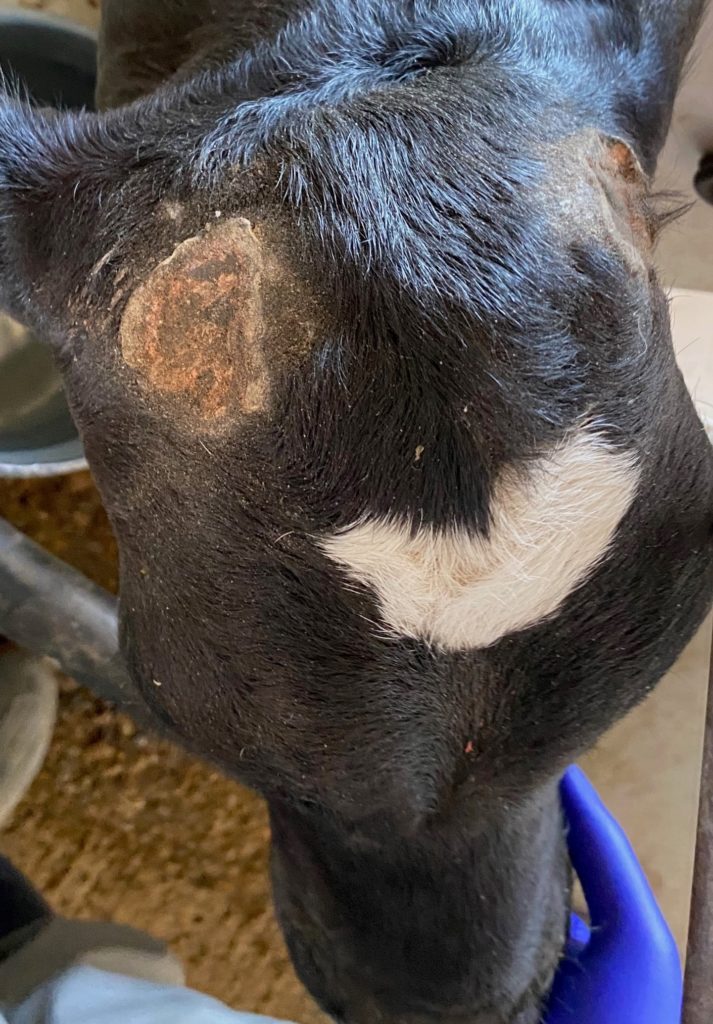
Techniques: For caustic paste, technique decisions include the amount of paste, use of a balm around the horn bud, covering with tape, shaving the hair, or wiping the paste off after a set time period. The suggested amount of paste to use varies by manufacturer by referring to a quarter, a pea, or the amount of turns in the tube you should make. In our recent study (Drwencke et al.) we applied Dr. Naylor’s paste on the third day of life using 0.25 mL per unshaved horn bud on calves weighing less than 75 lbs and 0.3 mL for those 75 lb or more (Figure 3). These amounts allowed for sufficient coverage of the horn bud when applied and resulted in no regrowth. In a pilot study, we used only 0.05 mL per horn bud, but this amount did not lead to sufficient damage to horn-growing tissue and lead to regrowth in 46% of animals. While the precise quantity to apply is still unknown, one thing is clear, a large volume of paste leads to extreme burns. When too much is applied, the paste wounds increase in size and severity, often creating a wound that looks like a plate on the top of the head instead of being focused on the horn bud (Figure 4). In addition to preventing more severe injuries, using less paste may reduce the risk of undesired burns.

In a pilot test, we found that using a balm increased the paste running and mixed with it, creating a mess. When tape was used, we found the paste spread out more and increased the size of the wounds. Farms have reported mixed results with how successful they found the use of tape and balms (Saraceni et al., 2021). In our recent study (2021), we chose to leave the horn buds unshaved, based on a producer recommendation who was having success with it keeping the paste where it was applied. Other producers have also mentioned wiping the paste off after an hour of application to help reduce the risk of calves rubbing it off. There is currently no research available on how shaving the hair, using tape or balm, or wiping paste off may influence disbudding success, infection rates, wound severity, or other factors.

Outcomes from our research: We found that caustic paste wounds took an average of 15 weeks to heal, twice as long as hot iron wounds. While the wounds followed a similar progression, the paste wounds sank into the calf’s head, which differed from the hot iron wounds (Figure 2). The wounds from caustic paste disbudding are also more sensitive to touch for at least 6 weeks compared to intact buds, which is as long as we looked before disbudding the control calves. We also found that calves with caustic paste wounds were more responsive to touch on their wounds through the entire process than healed tissue.

Best practice for mitigating pain

Regardless of the method or timing of disbudding, the current gold standard for mitigating pain is to combine a local block and an NSAID (Non-Steroidal Anti-Inflammatory Drug). A local block, such as lidocaine, reduces the initial pain at the time of the procedure, both for hot iron and caustic paste disbudding. Behavioral changes that indicate pain are observed immediately for hot iron disbudding and within 5 minutes of paste being applied, supporting the use of a local block. An NSAID like meloxicam helps suppress the inflammatory response for up to 3 days afterwards. Pairing a local block with an NSAID is the best currently available technique for pain relief. We have made a YouTube video that shows how we give pain relief and hot iron disbud. An additional resource is available by visiting this website from the University of Guelph.

Other considerations

Two other considerations for farms as they approach disbudding include the risk of horn regrowth and the ease of implementation. Horns can regrow with any method of disbudding if there is insufficient tissue damage. Some farms have reported a higher rate of horn regrowth when using caustic paste compared to hot iron (Saraceni et al., 2021). Finally, the ease of implementation either due to employee training, access to resources such as electricity, and cooperative standards can all influence the method and technique of disbudding on farm.

Figure 1: An infrared sensor is used to measure the temperature of a hot iron. When disbudding, hot irons should be heated to between 750°F to 900°F. The iron can cool as it is used on calves and should be re-checked for temperature when disbudding a series of calves, one after another.

Figure 2: The wound healing process following disbudding with 3 different tools. The final photo shows when a new layer of skin has formed. For hot iron disbudding this takes an average of 8 weeks and caustic paste average 15 weeks.

Figure 3: Paste on a gloved finger and spread in the area of a US quarter. Our research used 0.25 mL on calves weighing less than 75 lbs and 0.3 mL on calves’ weighing 75 lbs or more. In a pilot study, 0.05 mL resulted in almost half the calves re-growing horns, while the 0.25-0.30 mL prevented all horn regrowth.

Figure 4: A large disbudding wound from applying too much paste. The approximate size of the horn bud is indicated by the white circle. The wound extends far beyond the edges of the horn bud, indicating less paste could have been used and created a smaller wound.

References:

Adcock, S. J., & Tucker, C. B. (2018). The effect of disbudding age on healing and pain sensitivity in dairy calves. Journal of Dairy Science101(11), 10361-10373. https://doi.org/10.3168/jds.2018-14987

Adcock, S. J., & Tucker, C. B. (2020). The effect of early burn injury on sensitivity to future painful stimuli in dairy heifers. Plos one15(6), e0233711. https://doi.org/10.1371/journal.pone.0233711

Adcock, S. J., Vieira, S. K., Alvarez, L., & Tucker, C. B. (2019). Iron and laterality effects on healing of cautery disbudding wounds in dairy calves. Journal of Dairy Science102(11), 10163-10172. https://doi.org/10.3168/jds.2018-16121

Drwencke, A.M., Adcock, S.J.J., Tucker, C.B. Wound healing and pain sensitivity following caustic paste disbudding in dairy calves. In preparation.

Reedman, C. N., Duffield, T. F., DeVries, T. J., Lissemore, K. D., Adcock, S. J., Tucker, C. B., Parsons, S.D., & Winder, C. B. (2022). Effect of plane of nutrition and analgesic drug treatment on wound healing and pain following cautery disbudding in preweaning dairy calves. Journal of Dairy Science105(7), 6220-6239. https://doi.org/10.3168/jds.2021-21552

Saraceni, J., Winder, C. B., Renaud, D. L., Miltenburg, C., Nelson, E., & Van Os, J. M. (2021). Disbudding and dehorning practices for preweaned dairy calves by farmers in Wisconsin, USA. Journal of Dairy Science104(11), 11995-12008. https://doi.org/10.3168/jds.2021-20411
I’ve Got A Solution for That!

Putting Hutches to Work for Other Uses

Compiled by Abbey Dugan and Kelly Driver

Just when I think I’ve seen and heard it all, I find myself tapping the brake pedal on my truck as I pass by hutches and continue to be amazed at all the ways people are using their hutches.

  • A dog house
  • Covering an outdoor generator
  • A safe space to lock ducks in overnight
  • Being used in a life-size Dungeons & Dragons game

Regardless of the use, seeing animals live their best lives in Calf-Tel housing makes my heart the happiest. So, I thought it would be fun to share a few photos.

Hello!
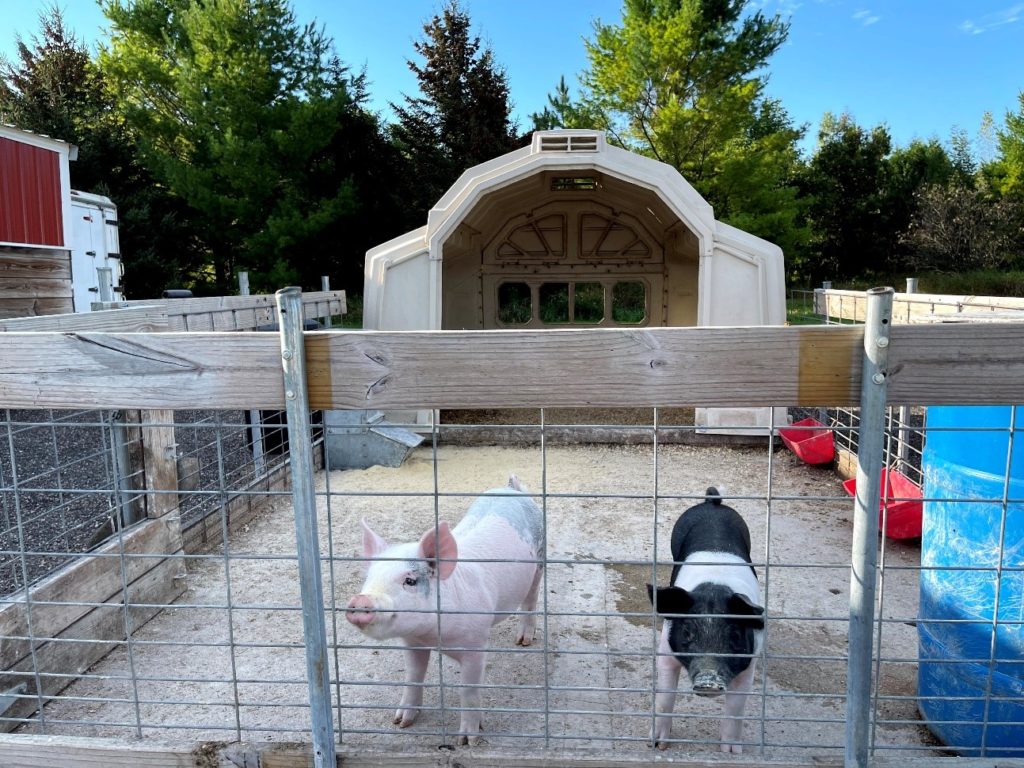
  • A pair of swine!
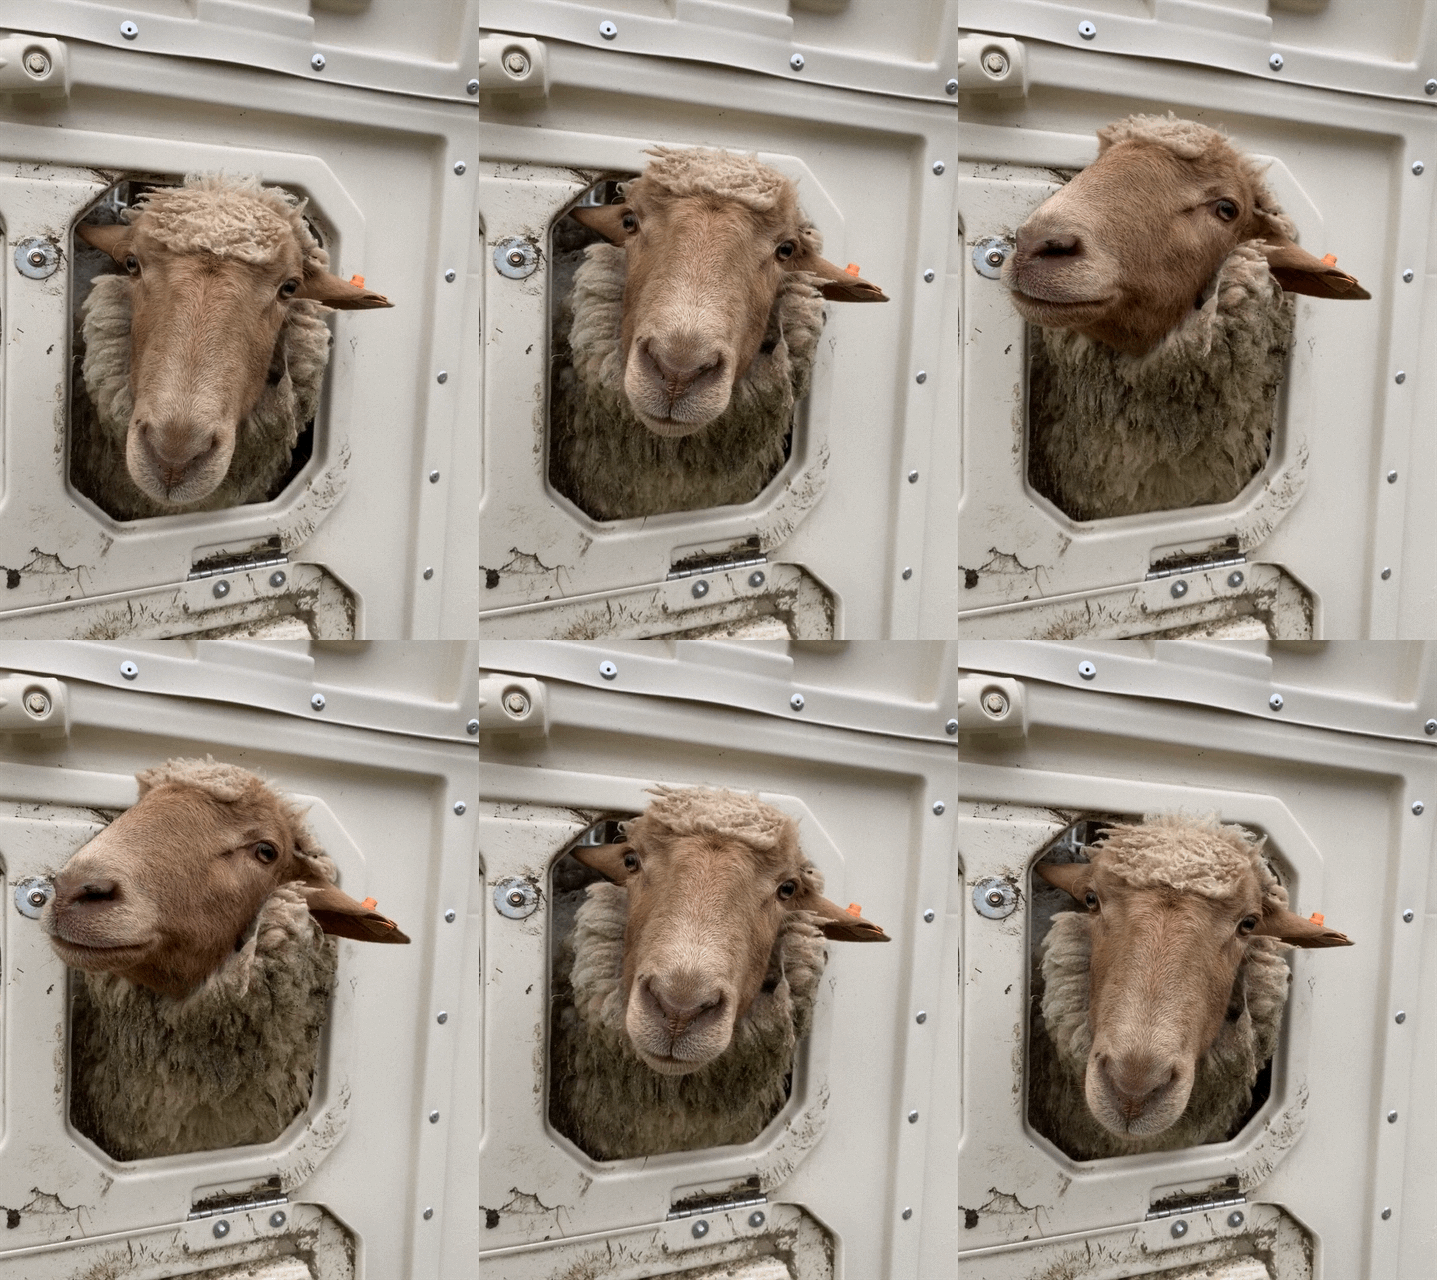
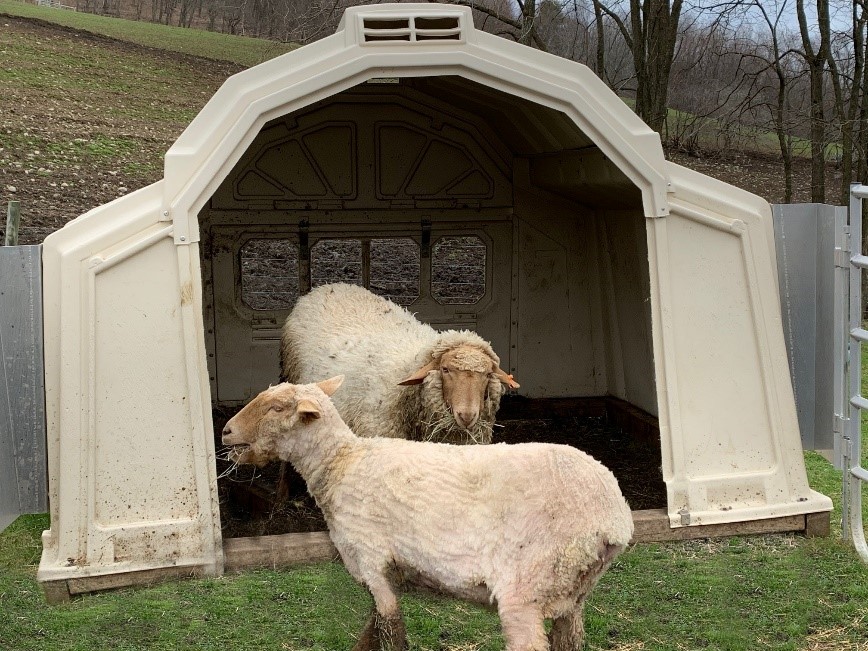
  • A sheep duo named Rambunctious & Ewe-calyptus
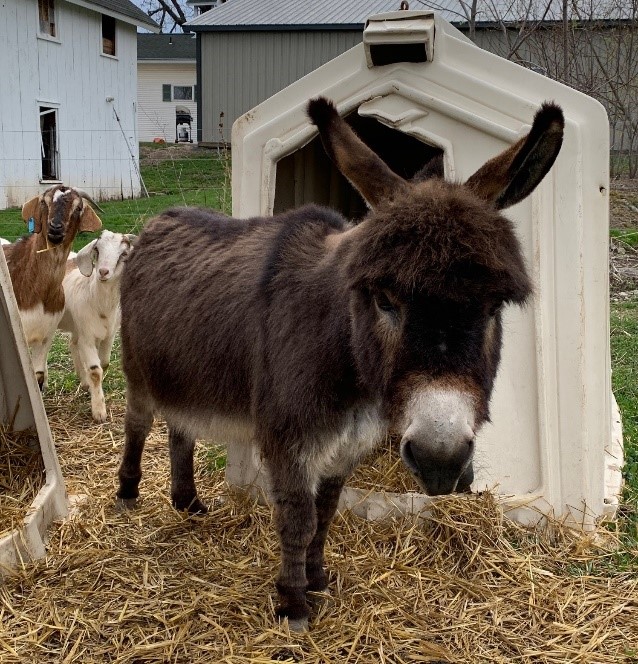
Mini Donkey
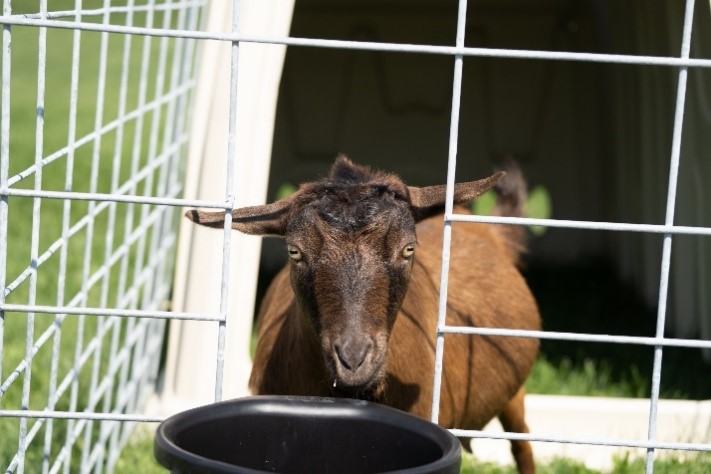
Goats!

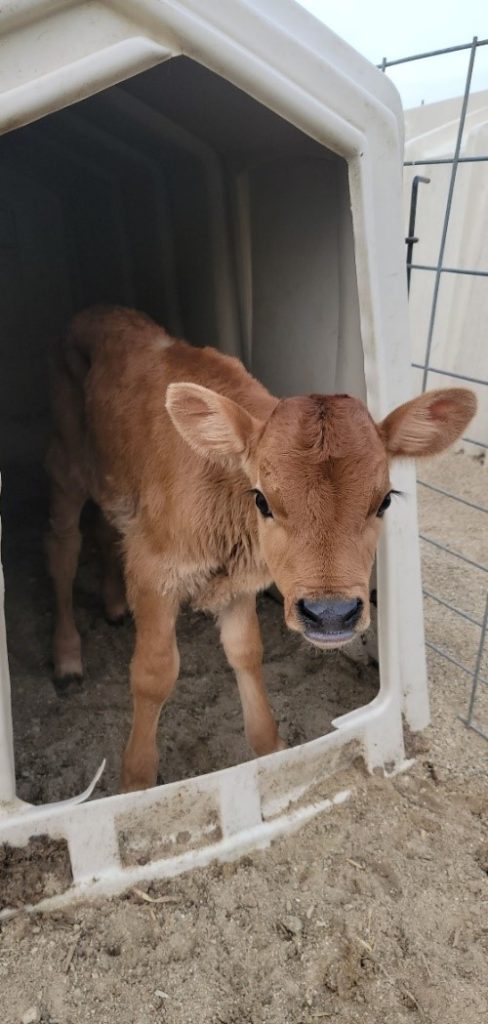
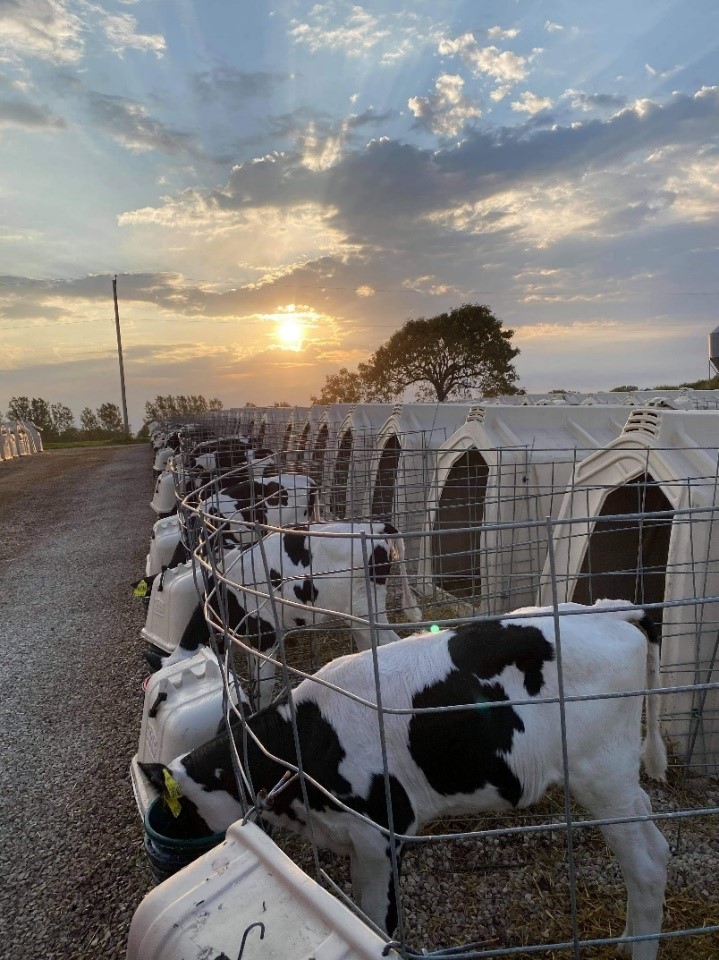
But whatever the use, our favorite are still the dairy calves. 😊

If you have a unique use or alternate livestock in your Calf-Tel hutches, please share a picture with us by email at kellydriver@hampelcorp.com.

Barn Windmill

Locate your nearest Calf-Tel dealer

Our dealers understand the complexities of raising cattle and can help identify the best, most cost-effective solution for your operation.